This page describes the Goods Receipt method of listing product on Epos Now. This is method is deprecated on new accounts. This page is retained to support legacy accounts. Please see Introduction to the Gift Aid Recorder App for Epos Now for the latest information.
This page details the basic process for opening a donor account, receiving donated items, updating Epos Now product and stock records, printing labels through to sale at the till.
Gift Aid Recorder Interface
When you first login to Gift Aid Recorder you are presented with the dashboard. Other areas of the system can be reached through the menu system which is split into sub-menus of related functionality. You can return to the dashboard at anytime by clicking the “Home” menu item.

Adding a new donor
Click “Start” on the dashboard to begin adding a new donor.
First you are presented with a search page. Enter the new donor postcode and click search.
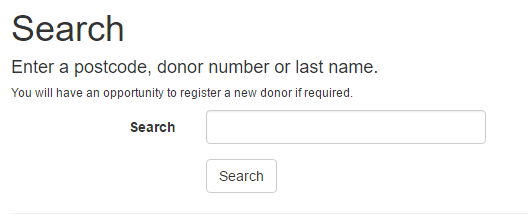
Note: The same function is used to locate an existing donor. An empty results list provides useful confirmation that the donor has not previously been registered.
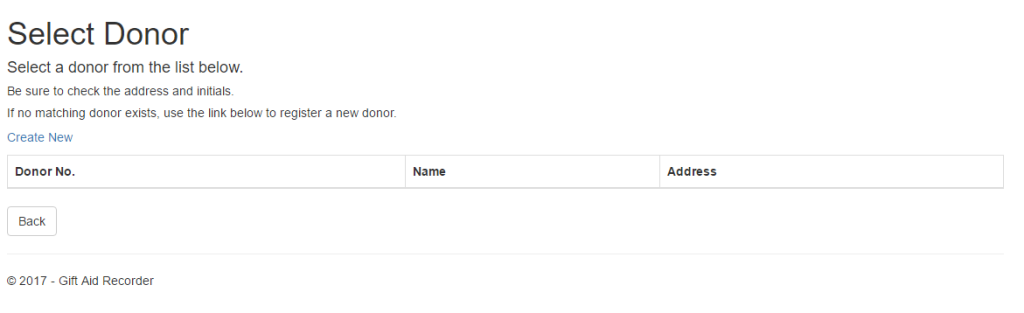
Click “Create New” to open the new donor wizard. A series of forms designed to guide you through the process of registering a new donor.
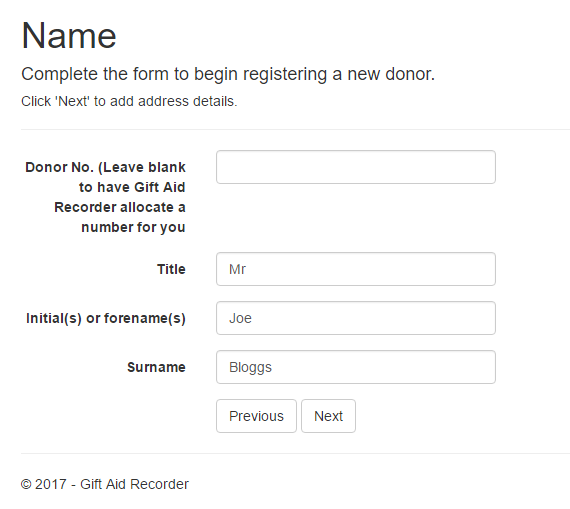
Complete the donor title, first name and last name fields. At least an initial is required in the first name field. Leave donor no. blank to have Gift Aid Recorder allocate a donor no. Click “Next” when done.
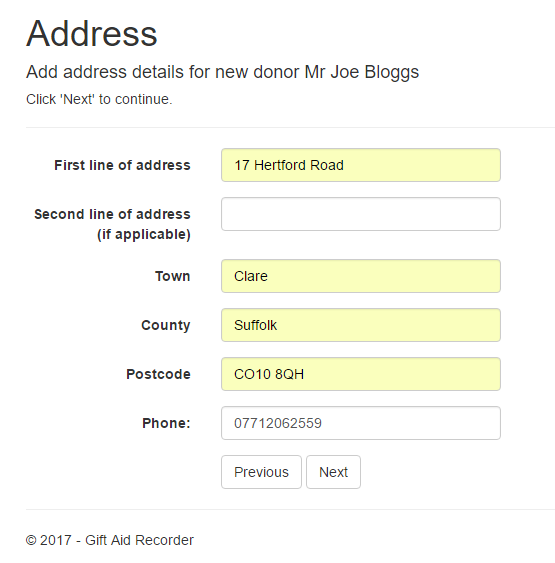
Complete address fields. First line of address is required. Postcode and phone number when provide must be in a valid format. Click “Next” when done.
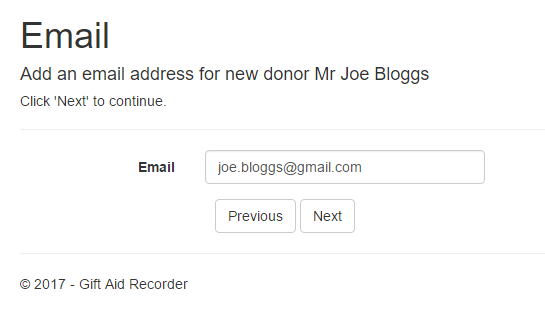
Enter an email address if provided. Click “Next” when done.
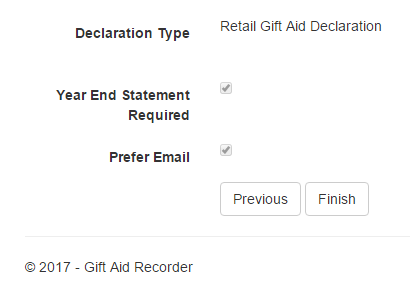
Confirm you are in possession of a valid Gift Aid declaration. For retail Gift Aid the declaration type must be “Retail Gift Aid Declaration”. Click “Next” when done.
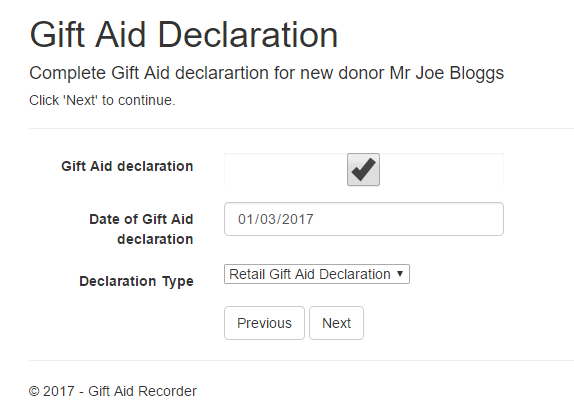
Note: A retail Gift Aid declaration must state the terms of the agency agreement between donor and charity whereby the charity agrees to act as an agent in the sale of goods on behalf of the donor and the donor agrees to donate the net proceeds of sale to the charity in accordance with the terms of the agency agreement.
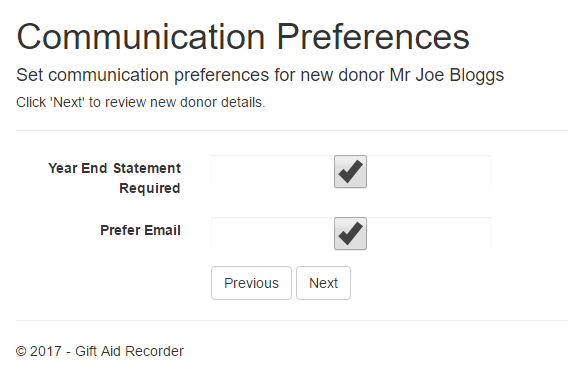
Complete communication preferences. Click “Next” when done.
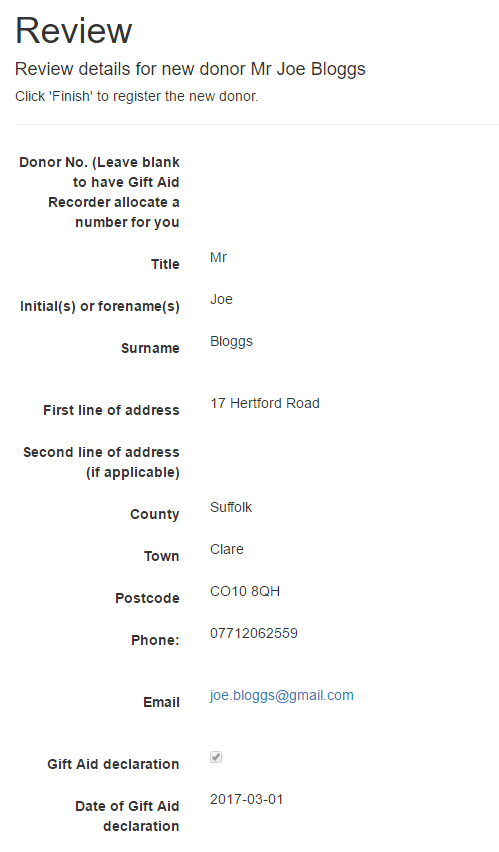
You are presented with an opportunity to review the data you have entered. Click “Previous” to make corrections. Click “Finish” to open a new donor account.
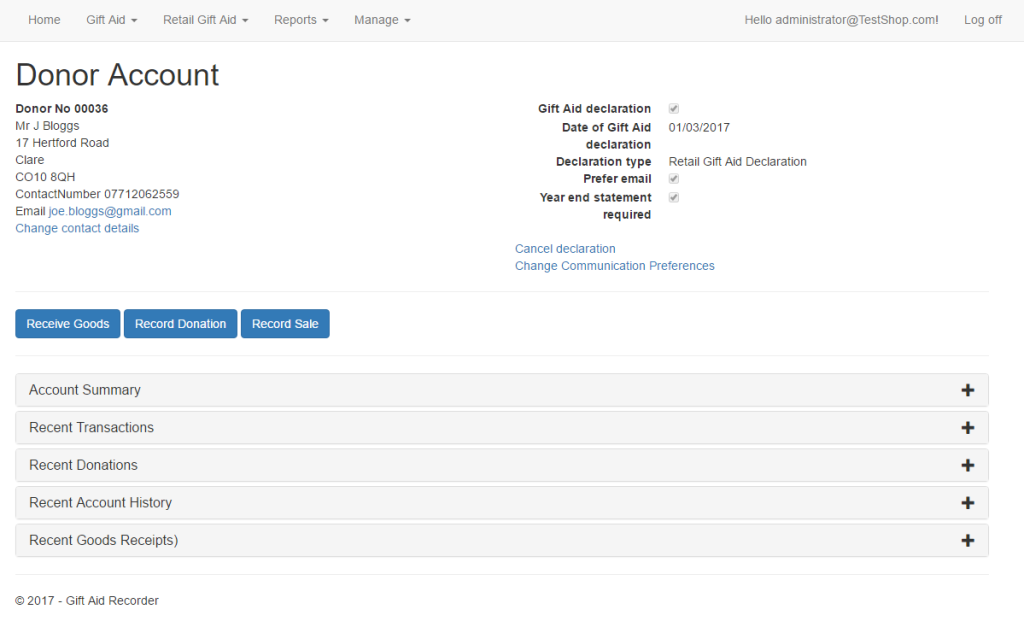
On the donor account page click “Receive Goods” to begin listing donated items.
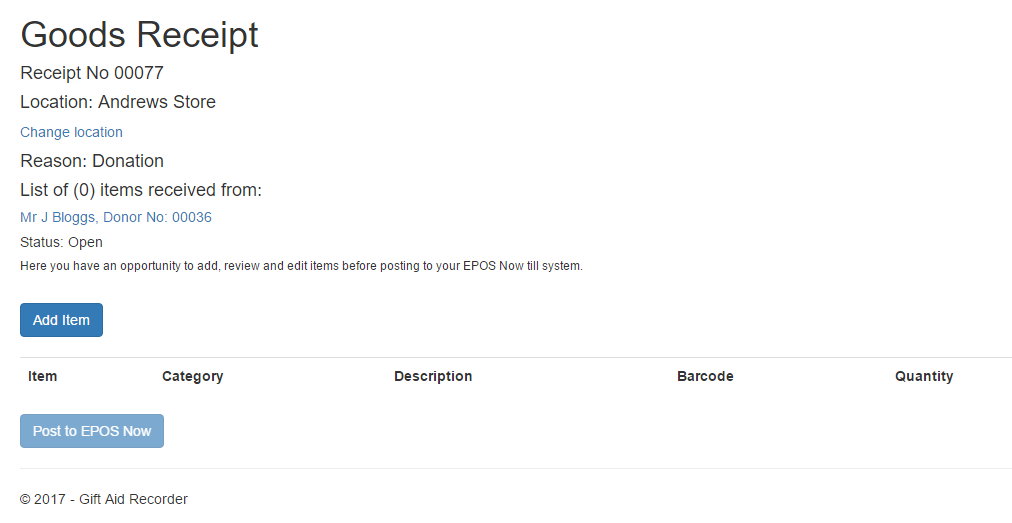
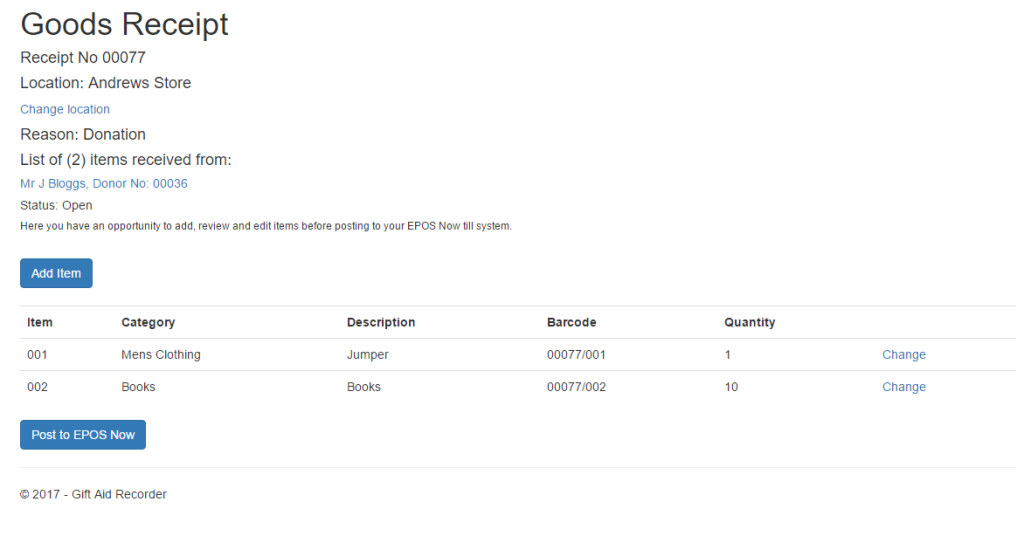
A new goods receipt is created. Gift Aid Recorder allocates a goods receipt no. and defaults the location to the logged in users main location. Click “Add Item” to add the first item to the goods receipt.
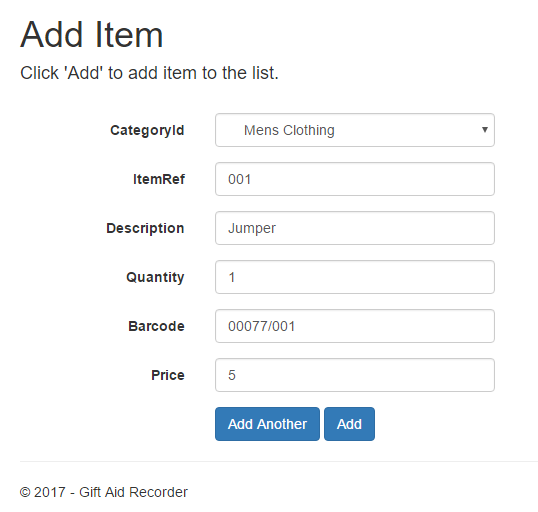
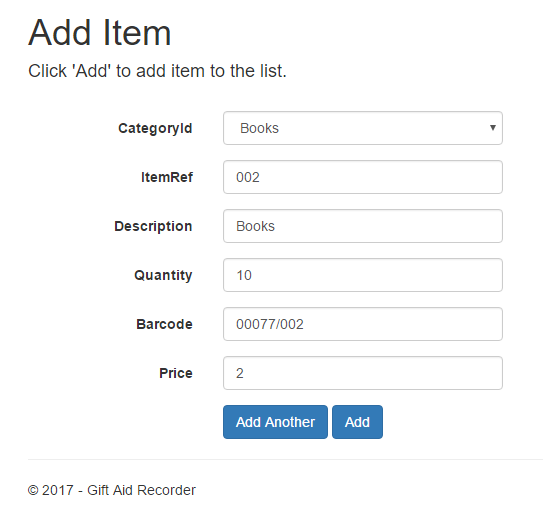
Select product category, enter a description, quantity and price. Item ref and barcode are automatically set by Gift Aid Recorder. By default description is set to the same as the category.
To continue adding items click “Add Another”. Click “Add” when done or you want to return to the goods receipt to confirm your listings.
Confirm your listings and use “Change” to make any amendments. Click “Post to Epos Now” to create a stock transfer record in Epos Now.
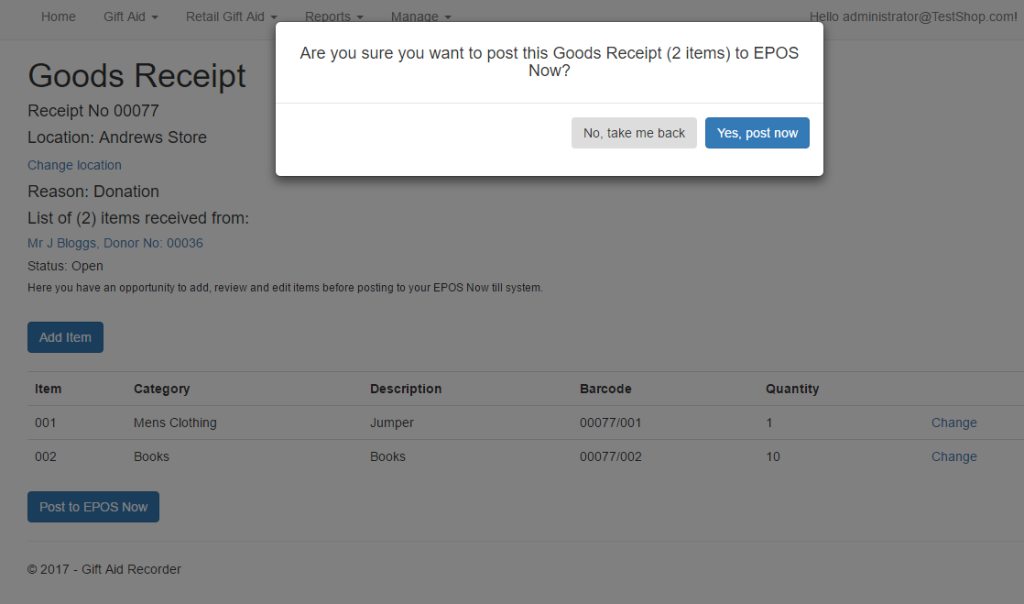
Use the popup dialogue to confirm you want to post the goods receipt to Epos Now.
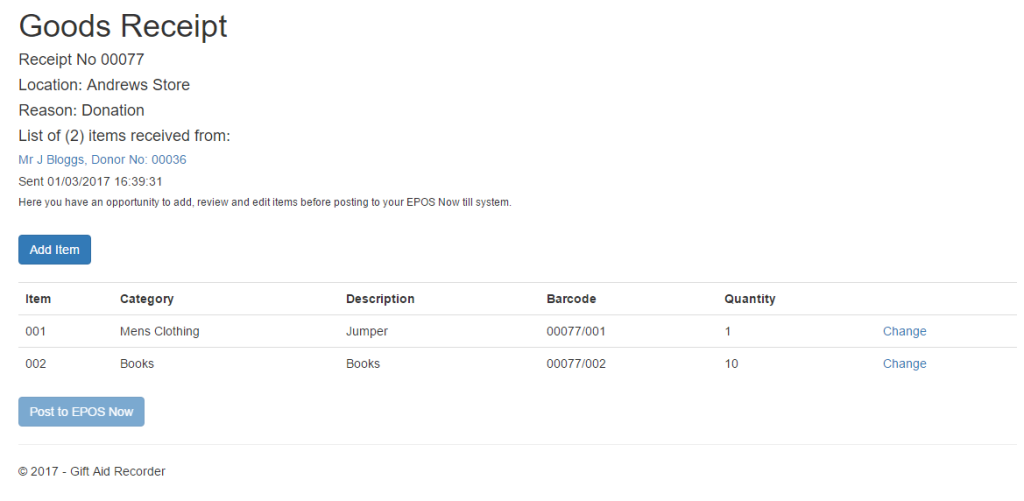
Goods receipt status changes to “Sent”.
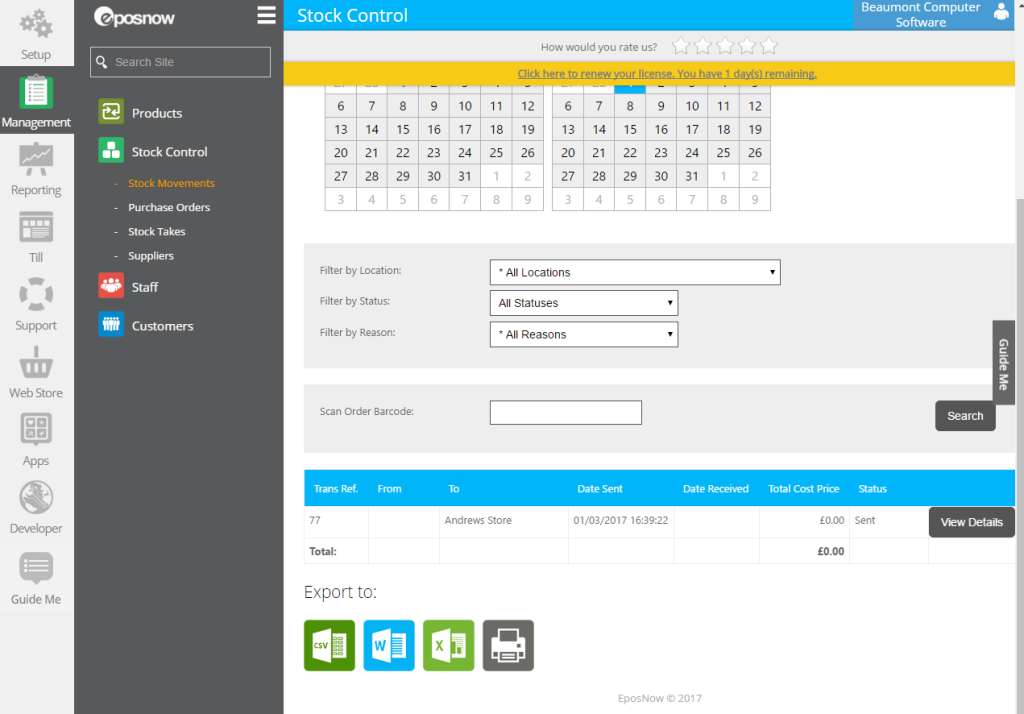
Open your Epos Now back office and navigate to Management – Stock Control – Stock Movements. Here you will find a stock movement with transfer reference matching the Gift Aid Recorder goods receipt no. Click “View Details”.
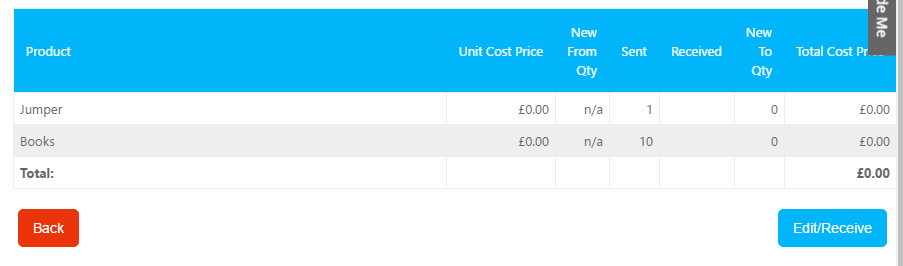
Click “Edit/Receive” to receive the new items into stock.
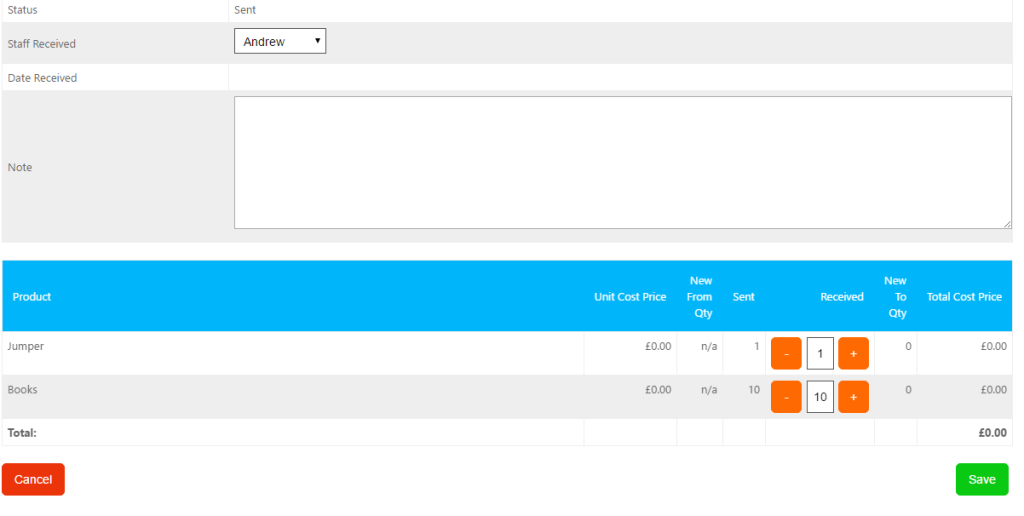
Select a staff member and click “Save”.
Scroll back to the top of the stock movement details page and click “Print Labels”.

Typically you will select a custom label template with price (ex tax), description and barcode. You will select the barcode printer and scroll to the bottom of the page to click “Generate Labels”.
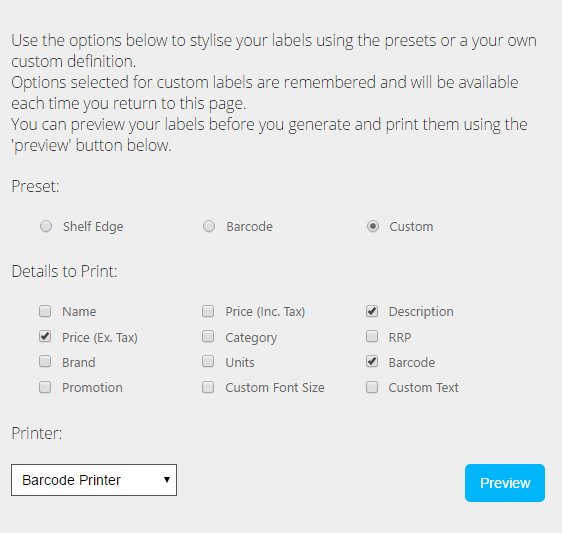
Note: It is important to select description in order to meet the requirement to identify Gift Aid donors on item labels.

Attach barcode labels to swing tags and display items in store. The items can now be scanned and sold at the till. Gift Aid Recorder will keep track of sales and manage the Gift Aid process.